Custom tools (I want more)
Warning
Python Object Oriented Programing knowledge needed below
If you have an idea for a new image processing tool or you want to port an already existing one into IPSO Phen. As long as you understand Python Object Oriented programming it's relatively easy.
We're going to build a really simple tool that rotates an image
Warning
Before creating your own tools set
python USE_PROCESS_THREAD = False
in ui_consts.py.
Otherwise you will not be able to debug your tool
Some rules about tools that I think should be respected
- A tool should never overwrite delete or modify in any way a source image.
- 2 or more tools should never have the same name.
- If you create a tool, please make it available to everyone.
Some rules that are enforced by the test scripts
- Each tool must have a help page, it can be generated from within the app.
- Each tool must come with a test script, it can also be generated from the app.
- The processwrapper method must have a doc string, you can copy the contents of the _help tab as seen below.
Create the skeleton
In the main menu select File/New tool, a wizard form should appear, cf. image below.
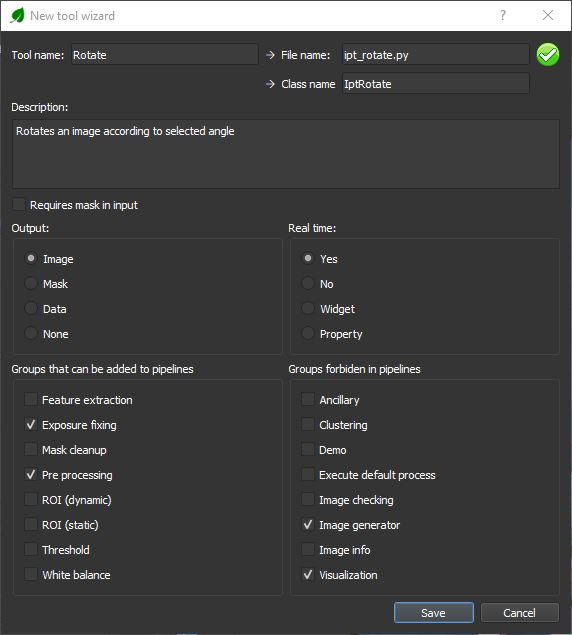
We fill the wizard as follows:
- Tool name: Sets the name used in the UI, File Name and Class name are filled automatically.
- Description: Describe the tool, this string will be used all along the documentation.
- Output: Type of output selected
- Real time: Wether or not the tool will react when a widget is modified
- Groups: Groups to which the tool will be added, using in the UI and when positioning the tool in a pipeline
Warning
Try to avoid real time if tool takes more than a second to process
If the icon on the top right corner is read, it means that a tool with the same name already exists. IPSO Phen will not override an existing tool.
Once we click on save we obtain the skeleton below
1 2 3 4 5 6 7 8 9 10 11 12 13 14 15 16 17 18 19 20 21 22 23 24 25 26 27 28 29 30 31 32 33 34 35 36 37 38 39 40 41 42 43 44 45 46 47 48 49 50 51 52 53 54 55 | |
Adding widgets
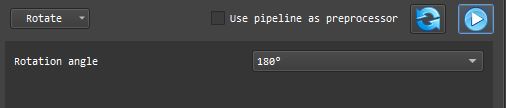
As we're making a simple rotation tool we're just going to add a combo box to our user interface. If you want to know more about available widgets you can check the Demo tool documentation.
1 2 3 4 5 6 7 8 9 | |
Info
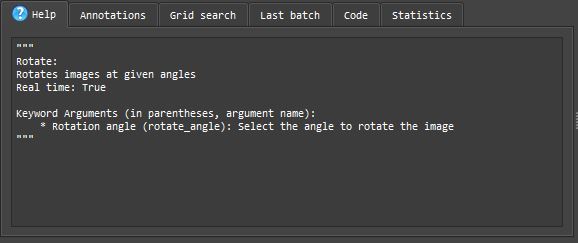
Once the widgets are added the docstring is available from the main UI in the help tab (see below)
The main method
Now we're just going to add some code to the main method to actually rotate the image.
Tip
Don't forget to add any needed import.
For instance, here we use OpenCV which is imported with
import cv2
1 2 3 4 5 6 7 8 9 10 11 12 13 14 15 16 17 18 19 20 21 22 23 24 25 26 27 28 29 30 31 32 33 34 35 36 37 38 39 40 41 42 43 44 45 46 47 48 49 | |
Info
Debugging custom tools:
All tools are processed in a different thread which the Python debugger can't see. In order to be able to set breakpoints you must disable multi threading by changing the value of USE_PROCESS_THREAD to False in ui_consts.py.
Warning
DO NOT FORGET to set it back to true afterwards
The actual tool
The next time you launch IPSO Phen you should have:
The Rotate tool available for selection with its UI
The help tab should look like this like this
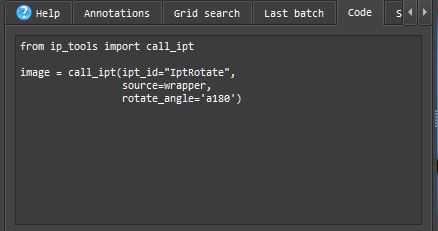
The code generation should update itself when you change the tool
But most importantly, the tool should work.
Things that will make everyone's life easier
Generating the mark down documentation
Click on Help/Build tool documentation to create a help file. All tool help files follow the same structure, when you click on Build tool documentation, the source image and the image on the output panel are used to generate the help.
And then you can click on the menu item below to update IPSO Phen documentation so your tool will be included in the Tools section.
Generating test script
Click on Help/Build test files to generate all missing test scripts. A fully functioning script wil be generated for the new tool, no existing scripts will be overwritten.